Photobucket Photobucket Photobucket Photobucket Photobucket Photobucket
Showing posts with label Recipes. Show all posts

Thursday, February 9, 2012

Cranberry Lemon Heart Scones

IMG_4571

Can you believe that Valentine's Day is on Tuesday?
I had all these plans for projects :)
I was going to make things.  Pinterest things.

Well those projects may or may not get done but either way at least I made these yummy heart scones.

IMG_4577

I used a scone recipe from Baked Bree, halved it and substituted cranberries for blueberries.
You can find her recipe HERE.

I also left out the vanilla in the glaze, substituting milk, but that had more to do with color than flavor.

Picnik collage

A quick word about scones.  It seems that some people like them dense and crumbly while others like scones to be light and flakey.

These are definitely the lighter, flakey type.
They have the consistency of a biscuit and are very yummy.

Picnik collage

These would be perfect with a nice cup of coffee or tea for your honey on Valentine's Day!

If you aren't feeling the completely homemade scones you could always try these easy semi-homemade Raspberry Heart-shaped Cinnamon Rolls.

Do you have plans for Valentine's Day?

Saturday, January 28, 2012

Raspberry Heart-shaped Cinnamon Rolls

Picnik collage

Valentine's Day is just around the corner and I've been thinking of some easy treats.

These Raspberry Heart-shaped Cinnamon Rolls are quick to make and easily customizable.

Although you could most certainly make this all by scratch if you're feeling fancy,
I used store-bought cinnamon rolls and raspberry preserves.

Picnik collage

I made these in both plain and raspberry but the raspberry won out in making this treat special.

Raspberry Heart-shaped Cinnamon Rolls
Open your package of dough (try not to flinch)
Unroll until it's completely flat.
Cover with a layer of raspberry preserves- there will be some ooze and you're going to lose some during baking so mess is unavoidable.
Roll both of the edges until you almost meet in the middle.
Pinch the bottom to complete your heart.
Lick fingers.
Bake according to package directions.
Frost.
Eat.

Perfect for a Valentine breakfast, gift or surprise treat!

Picnik collage

Can you just see all the possibilities?

Strawberry, orange marmalade, blackberry, apple butter, apricot, bacon, what?

IMG_4307

I may have to try them all.

Friday, October 14, 2011

Lemon & Blueberry Layer Cake

IMG_9683

In honor of B's birthday today, I'm doing a cake post!
Only I didn't actually make him a cake.
Although, I was thinking of doing this one.
I know it seems like a total copout but I know he'll love it.

This cake is the result of 3 different recipes and 
several different inspirations like this.

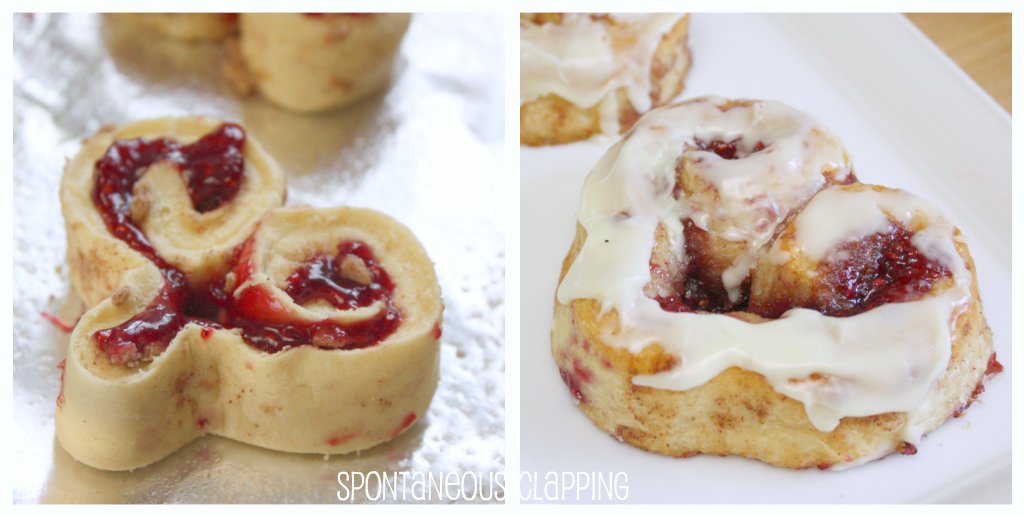
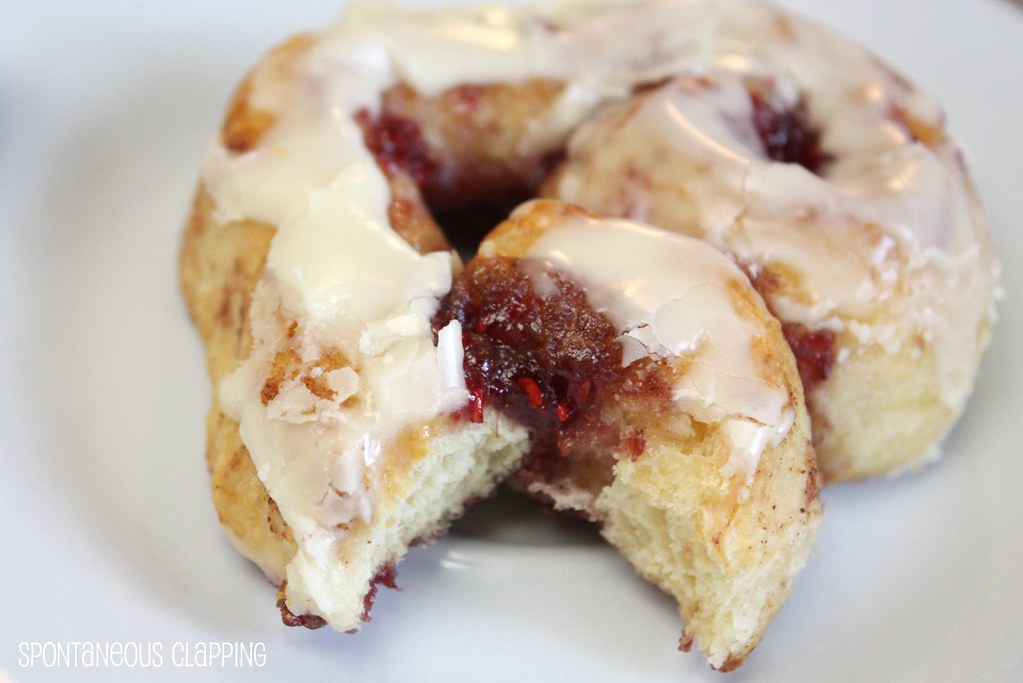
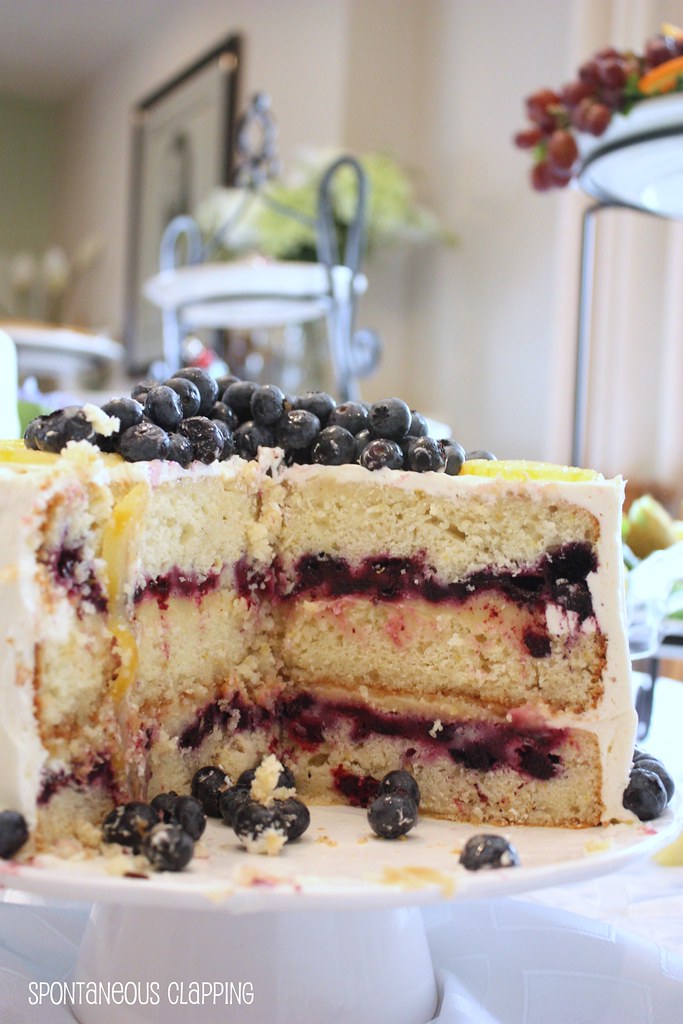
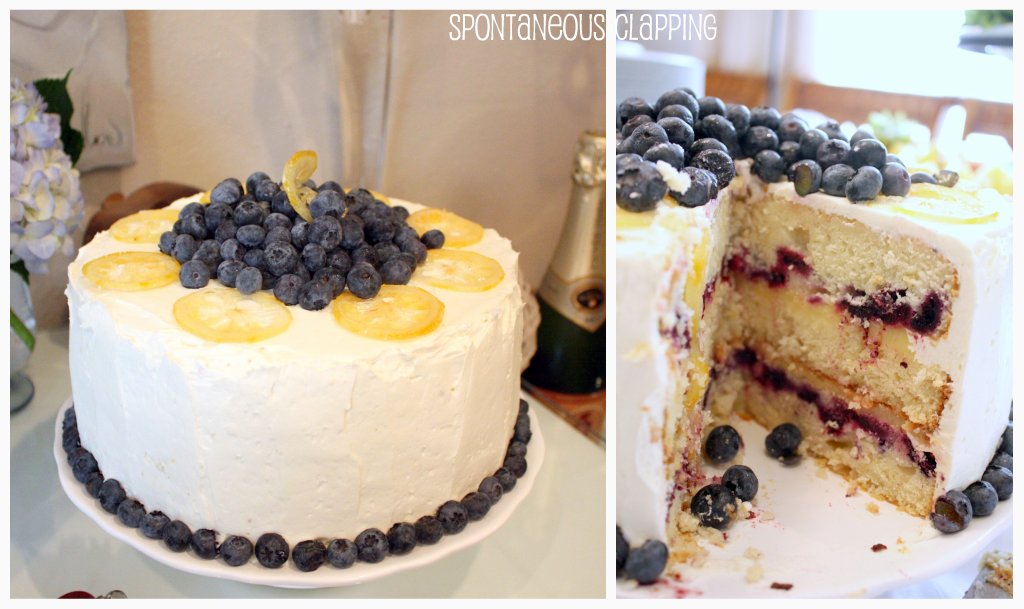
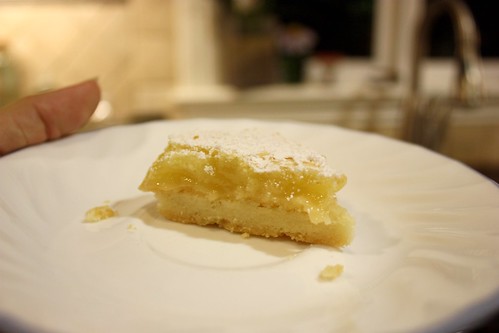
The ending result was fantastic.
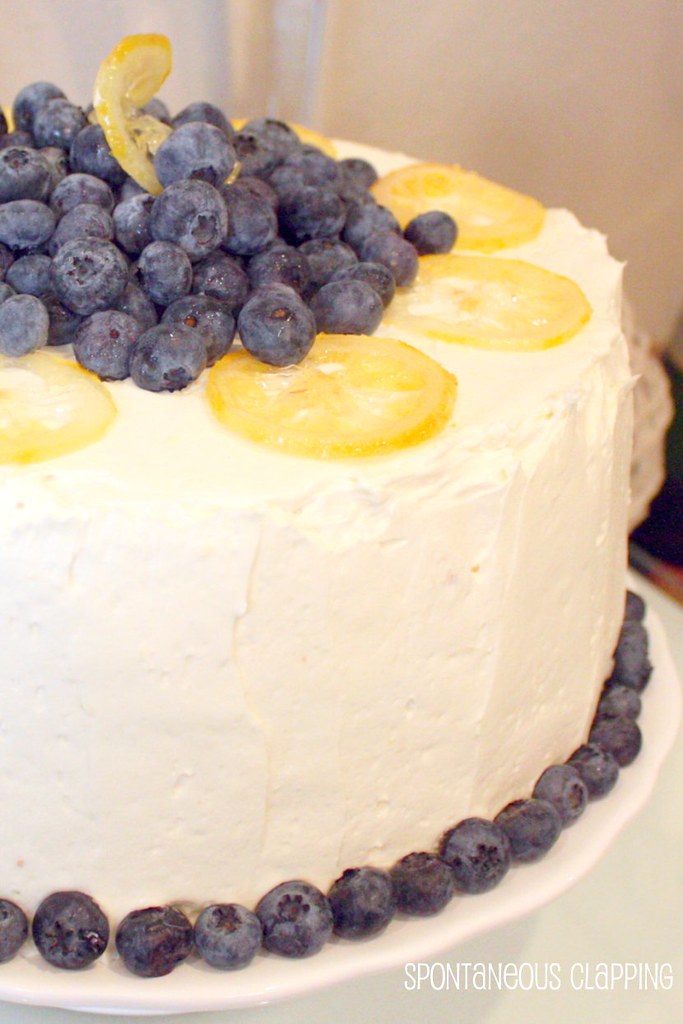
Lemon blueberry cake with lemon curd filling and a lemon buttercream frosting.
Although it sounds extra lemony it's not too tart at all.

The cake is dense and the blueberries sank when baking,
creating that great streak of blueberries.
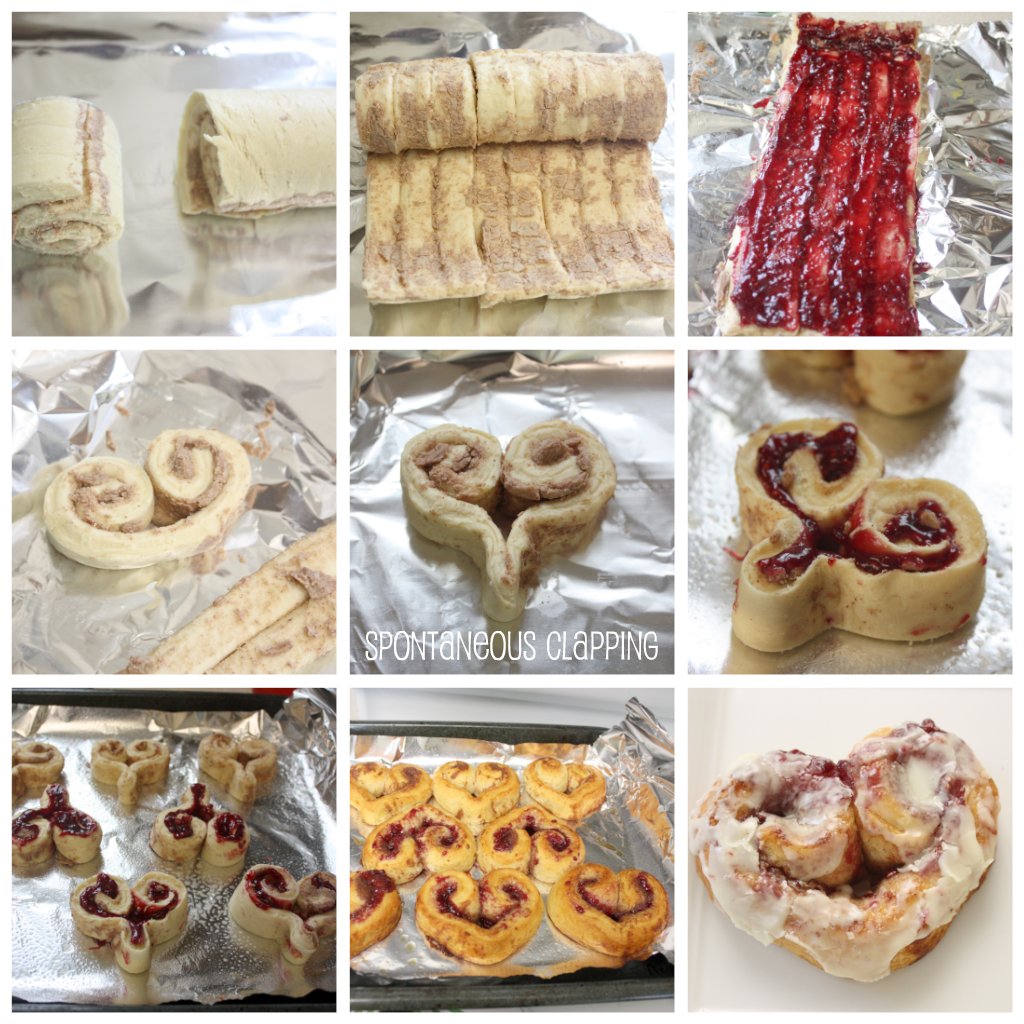
I stacked the cakes with the ends towards the center cake which does not have blueberries in it.

The cake recipe (and candied lemon) is adapted from Martha Stewart
the curd is my own recipe (doubled and the tiniest bit extra was served alongside the cake with a spoon for curd enthusiasts to add a dollop to their cake is so desired) 
and the frosting is from the Lemon Drop recipe in the Baked Cookbook

IMG_9699

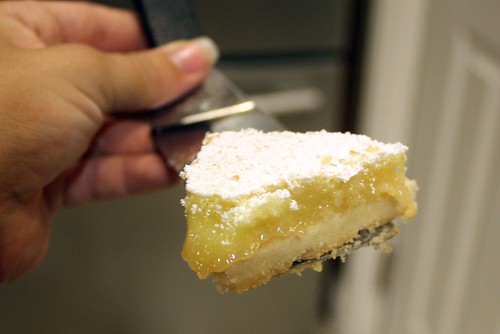
Lets start with the lemon curd as I really think you need to make this first and 
stick it in the refrigerator so that it's nice and cold when you use it.

The warmer the curd, the thinner and the more you lose to 
oozing out the sides when you stack your layers.

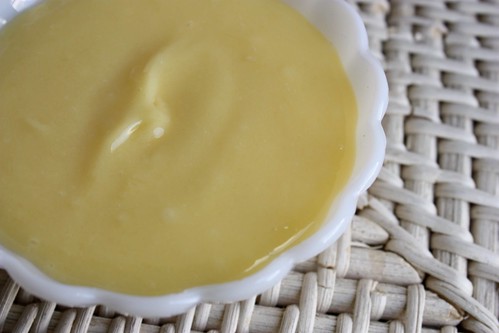
The Easiest Lemon Curd Ever
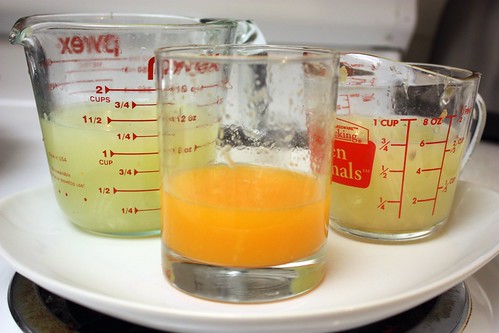
1 cup lemon juice
4 tsp finely grated zest (I run a knife over mine after zesting with a microplane)
2 cups granulated sugar
6 eggs
1 1/2 sticks unsalted butter, room temp

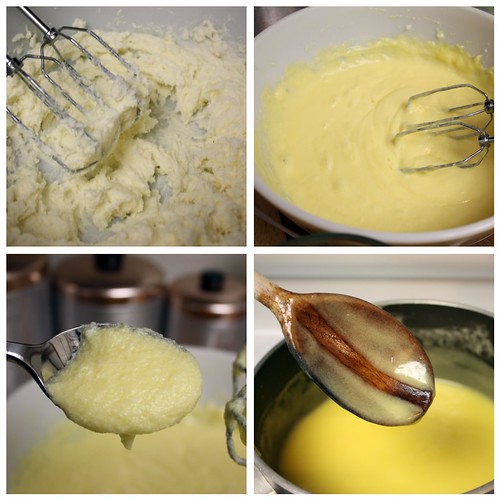
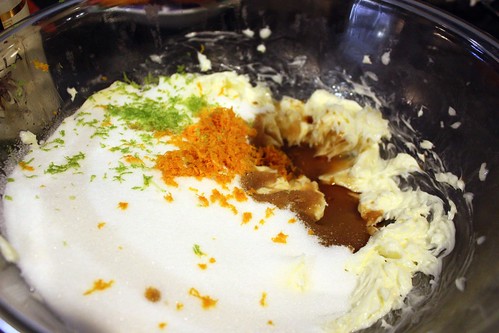
Cream your butter, add sugar and zest and mix well.

Add your eggs in, one at a time, mixing well after each addition.

Throw in your lemon juice and a pinch of salt. Mix, mix, mix.

At this point it will look all curdled and gross. Don't worry.

Pour the mixture into a pot and cook over low-medium until thick, stirring constantly. I'll be honest, I always put it up to medium because I'm super impatient. As it heats it will start to thicken. You'll know it's ready when the curd coats the spoon and stays in place when you run your finger (or another utensil) down the center.

You can keep this in the refrigerator for several days or break into small batches and freeze.

IMG_9678

Lemon & Blueberry Cake

  • 1 1/2 cup (3 sticks) unsalted butter, room temperature, plus more for pans
  • 3 3/4 cups all-purpose flour (spooned and leveled), plus more for pans
  • 3/4 teaspoon baking powder
  • 3/4 teaspoon baking soda
  • 1 1/2 teaspoons salt
  • 1 1/2 tablespoons lemon zest
  • 3 cups sugar
  • 3 large eggs plus 4 large egg yolks
  • 1/4 cup plus 1/3 cup fresh lemon juice
  • 1 cup low-fat buttermilk
  • 1 lemon, thinly sliced and seeded
  • 2 3/4 cup blueberries or about 3, 12 oz packages 
  • 2 cups will go into the cake and the rest is for decorating 

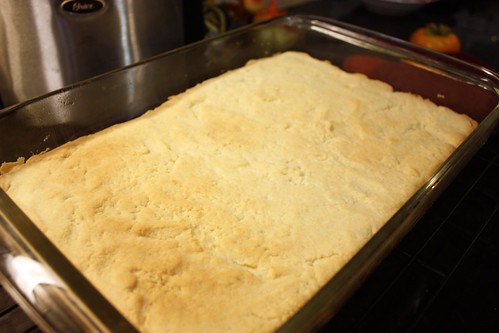
  • Preheat oven to 350 degrees. 

  • Butter and flour three 9-by-2-inch (or 8 inch if that's what you have) cake pans, tapping out excess flour. 
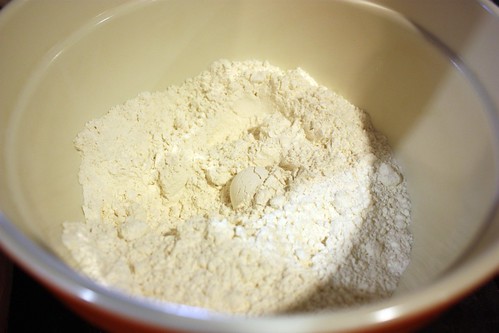
  • In a medium bowl, whisk flour, baking powder, baking soda, salt, and lemon zest.

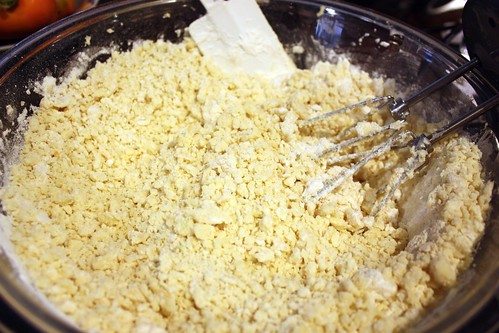
  • In a large bowl, using an electric mixer, beat butter and 3 cups sugar until light and fluffy. 
  • With mixer on low, beat in eggs and yolks, one at a time. 
  • Beat in 1/4 cup lemon juice. Alternately beat in flour mixture and buttermilk beginning and ending with flour mixture; mix just until combined.
*You can make your own buttermilk by taking a 1 cup measure, adding 1 tbs lemon juice, filling the remainder with low fat milk and allowing it to sit for 10 minutes.

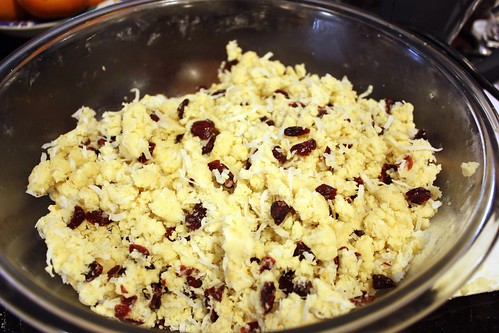
  • Pour 1/3 of the batter into one cake pan and smooth the top.  Add 2 cups of blueberries to the remainder of the batter and fold them in, then split between the 2 remaining pans and smooth the tops.

  •  Bake until cakes pull away from sides of pans, 32 to 35 minutes. Let cool in pans 10 minutes. 
  • Run a knife around edges of pans and invert cakes onto a wire rack.

  • While cakes are baking, bring remaining 1 cup sugar and 1 cup water to a boil in a saucepan. 
  • Add lemon slices and simmer 25 minutes. 
  • Using a slotted spoon, transfer lemon slices to a waxed-paper-lined plate to use for decorating later. 
  • Stir remaining 1/3 cup fresh lemon juice into syrup.

  • Using a toothpick, poke holes in warm cakes on rack. 
  • Brush with lemon syrup. I did this several times.  Let cool completely.

  • Once cooled I put them in the refrigerator because it makes them easier to frost.
If you wanted you could make these ahead and freeze.

  • Picnik collage
Lemon Drop Frosting

1 1/2 cup sugar
1/3 cup all purpose flour
1 1/2 cup milk
1/3 cup heavy cream
1 1/2 cups unsalted butter, soft but cool, cut into small pieces
1 teaspoon vanilla extract
1/2 cup lemon curd

In a medium heavy-bottomed saucepan, whisk sugar and flour together.
Add milk and cream and cook over medium heat, whisking occasionally, 
until the mixture comes to a boil & has thickened, about 20 minutes.

Transfer the mixture to the bowl of an electric mixer fitted with a paddle attachment.
Beat on high speed until cool.
Reduce the speed to low and add the butter; mix until thoroughly incorporated.
Increase the speed to medium-high and beat until the frosting is light and fluffy.

Add the vanilla extract and 1/2 cup of the lemon curd and continue mixing until combined.
If the frosting is too soft, put it in the fridge to chill then remix.
If the frosting is too firm (like if you made it the day before) let it sit out a while,
or place it over a pot of simmering water and beat with a wooden spoon until it is the proper consistency.


You want it firm enough to hold it's shape.


IMG_9683


Assembly


Place your plain lemon cake (without blueberries) on a flat surface and trim to make it level.


Place one cake layer on a plate or platter, top down (upside down).
Surround it with wax or parchment paper (cut into strips) 
so that you don't have to worry about frosting mess.


Pipe a ring of your frosting just inside the edge.
This will keep the curd in when you stack your layers.
If you feel your frosting is too soft, place the layer in the fridge for a bit.
Fill with about a cup of lemon curd.
Take your plain lemon cake and place in on top, then repeat with the frosting ring and the curd.
Finish with the third cake, bottom down (right side up).
Crumb coat the cake and refrigerate for 20 minutes.
Frost the sides and top of the cake.


Garnish with the candied lemon slices, pile the blueberries on top
and around the base and top off with one lemon slice, cut and twisted.


Refrigerate the entire cake for another 20 minutes to help it all set.
You can place this in a cake saver and store in a cool room for up to 3 days.
If it's too hot put it in the fridge just allow it to sit at room temp for 2 hours before serving.


I actually didn't have a cake saver so I just stuck it in the refrigerator and made sure there wasn't anything smelly near it :)


It was perfect.


This cake looks like a lot of work but everything can be done in phases ahead of time.
Everyone loved it.


Make this cake!

Tuesday, March 22, 2011

The Easiest Lemon (or Lime) Curd EVER

IMG_1886

No more double boiler, no more slowly incorporating butter, no more fear or little cooked bits of egg, no more straining.

I'd seen this method used before and it hasnt failed me yet.

Picnik collage

I started out with what I thought were a bunch of lemons (home grown from my parent's neighbors) and it ending up being mostly limes. So I went ahead and used all the lime juice for this curd.

Lemon (Lime) Curd Ingredients:
1/2 cup lemon (or lime) juice
2 tsp of finely grated zest
1 cup granulated sugar
3 eggs
6 tbs unsalted butter

Picnik collage

I made a double batch, so my mixture will look bigger.

Cream your butter, add sugar and zest (I didn't use zest because I forgot to zest the limes in my juicing frenzy) and mix well.

Add your eggs in, one at a time, mixing well after each addition.

Throw in your lemon juice and a pinch of salt. Mix, mix, mix.

At this point it will look all curdled and gross. Don't worry.

Pour the mixture into a pot and cook over low-medium until thick, stirring constantly. I'll be honest, I always put it up to medium because I'm super impatient. As it heats it will start to thicken. You'll know it's ready when the curd coats the spoon and stays in place when you run your finger (or another utensil) down the center.

You can keep this in the refrigerator for several days or break into small batches and freeze.

IMG_1885

It's great by itself, as a filling for cakes, cupcakes or tarts, on toast, paired up with fruit, mixed into freshly whipped cream or a million other things.

I'm going add it to strawberry shortcake. That is, if I can stop eating it straight out of the fridge.

Saturday, March 19, 2011

Tangelo Vinaigrette

IMG_1843

We've recently started getting a CSA box and I love that it challenges us to make new things. This is just an easy vinaigrette recipe.

Tangelo Vinaigrette
1/2 cup tangelo juice (or orange juice)
2 tbs balsamic vinegar
2 tbs honey
1 shallot (1 medium size bulb? clove? or 2 small)
3/4 tsp salt
3/4 tsp black pepper
3/4 cup walnut oil (or extra virgin olive oil)

Blend the first 6 ingredients and then leaving your blender on, add the oil in slowly.

Done.

I used a very mildly flavored walnut oil but EVOO would be perfect with this.


IMG_1817

We used tangelos and shallots from our CSA box and the honey is homemade.

This is honey from our Auntie Birdie and Uncle Bud's (and their dog Bodhi's) bees.

Birdie, Bud and Bodhi's Bees! Say that 5 times fast.

IMG_1822

I served it with a salad made of baby greens, pea flowers, toasted walnuts and tangelo segments.

IMG_0845

Originally I thought we were getting arugula flowers but after googling I noticed they didn't look like arugula flowers.

IMG_1821

As I was pulling the flowers, I noticed this.

I thought about not mentioning it to B. He had tasted them the first day and said they tasted like pea tendrils. He told me we should saute them. I told him they were supposed to be arugula flowers and we should add them to salad.

IMG_1827

I threw them on the salad anyway. Pretty, no?

IMG_1816

By the way, I have loads of citrus right now. I decided to juice some and you can expect some more citrus recipes coming up.

Left to right you see lime juice, tangelo juice and lemon juice.

I also have oranges, madarin orange and tangerines... any recipe suggestions?

Thursday, March 10, 2011

Shortbread Brownies

IMG_0463

I made these brownies for the brunch I went to the other day. You know, something light and brunch-y, like dark chocolate brownies with shortbread.

A brownie is just not enough, now it needs to have a shortbread crust.

It's a Better Homes and Gardens Recipe (printable version here) and it would be really easy and fast... unless your a scatterbrained mess like me.

IMG_0381

Preheat your oven to 350. Line 9x9x2 inch baking pan with foil with the foil coming out over the sides. You're going to use that as handles to lift the bars out later.

In a bowl mix 1 cup flour and 1/4 cup brown sugar.

Using a pastry blender, cut in 1/2 cup butter until the mixture looks like coarse crumbs.

IMG_0388

Of course, I couldn't find my pastry blender (and didn't think about my mixer or food processor) and used both a potato masher (really?!) and my fingers.

Stir in 1/4 cup of mini chocolate chips.

Actually, I just chopped up some regular chip. I didn't read the directions carefully and added 3 times the correct amount of chips.

IMG_0389

Press it all into the pan and bake for about 8 minutes.

IMG_0390

In a large bowl combine 1 1/3 granulated sugar, 3/4 cup flour, 1/2 cup of unsweetened cocoa powder, 1 1/2 tsp of baking powder and 1/2 tsp salt.

I used Hershey's Special Dark Cocoa... so glad to finally have it in the stores around here.

Add 3 eggs, 1/3 cup melted butter and 1 tbs vanilla. Stir in 1/2 cup chocolate pieces and spread over crust.

This is when I realized that we only had 1 egg. It was 10 pm the night before the brunch and I was tired. So I went to bed and decided to finish the brownies in the morning.

IMG_0659

I neglected to take anymore pictures but B got up and went to the store. I mixed the remaining ingredients and poured it over the crust.

Only I forgot to add the chocolate chips, so I just threw some on top of the batter.

Bake in the oven for 40 minutes.

At this point I went to pull the brownies out and realized.... the oven wasn't on.

IMG_0463

Eventually the brownies were completed and despite my spastic recipe making they turned out really good. I might change up the recipe next time and do regular cocoa with dark chocolate chips. Tons of possibilities.

IMG_0524

Careful though, eat too many of these and you'll end up with fat sausage fingers, dimples instead of knuckles and rubberband wrists!

Tuesday, December 7, 2010

Pumpkin Caramel Bars with bacon

IMG_7579

That's right, with bacon. Adding bacon to desserts is all the rage right now and this is one trend I'm all for. I love a salty/sweet combo. I'm sure in years to come we'll look back at these combinations and say, "That is soooo 2010."

Oh but I love bacon.

IMG_7550

The recipe comes from my favorite food magazine Cuisine at Home. The mag has absolutely no advertisements! My mom saw this recipe and knew I would want to make it.

Anyway, you can google the name of the bars for a printable recipe. I was going to link to one but some of the pictures showed bars that were a little wonky. This reminds me.. my pumpkin bars were a little thin because I used a pan that was too big :)

Preheat your oven to 350 and coat a 9 x 13 inch pan with non-stick spray.

Cook up 8 oz of diced bacon until very crisp and drain on a paper towel lined plate.

Reserve 2 tbs dripping. Oh yeah.

IMG_7551

In a medium bowl whisk together 2 cups flour, 1 tsp baking soda, 1 tsp cinnamon and 1/2 tsp table salt.

IMG_7552

In a large bowl whisk together 1 1/2 cups pumpkin puree, 1/2 cup granulated sugar, 1/2 cup packed brown sugar, 1 egg, 2 tbs melted unsalted butter, 1 tsp vanilla AND 2 tbs bacon drippings.

Mmmmmmm.

If you are anti-bacon grease you can use melted butter. I guess. ~insert disapproving look~

IMG_7553

Stir in flour mixture and an optional 1/4 cup chopped, toasted pecans.

I like the texture they add.

IMG_7555

Spread evenly in the pan- it won't spread and even itself out during the baking process. Bake about 20 minutes or an inseryted toothpick comes out clean.


Cool completely before frosting.

IMG_7559

I skipped pictures of making the caramel because I know trying to cook it and shoot would only result in serious injury.


Boil 2 cups packed brown sugar, 1/3 cup water and a pinch of salt in a large saucepan over high, for 5 minutes, gently swirling occasionally to prevent burning.

Whisk in 1/2 cup heavy cream and 1 stick unsalted cubed butter. Keep whisking as it bubbles up and becomes frothy. Boil for another 2 minutes.

IMG_7561

Transfer the caramel to the bowl of a stand mixer and whip on high speed until the sides of the bowl are cool to the touch and the caramel is thick. Using the whisk attachment would be better than using the paddle attachment like I did.

The whole process will take roughly 10 minutes. You want the caramel to cool down so that it doesn't melt the cream cheese. Oh yes, we are going to add in 4 ounces of cream cheese, 1 ounce at a time until the frosting is cool.

IMG_7562

Frost your cooled bars and top with the chopped up bacon. I ran a knife over the bacon after cooking to break into small piece.

I wasn't sure how these bars would go over and so I left bacon off a portion of the pan.

None of that side got eaten.

IMG_7572

This picture is for Aunt Marie. She thinks if I must post anything not having to do with the Peanut I should at least include a picture of him.

His expression is a little odd because I woke him up trying to take a picture.

He'll get used to it.

IMG_7580

I'll be honest and say that I was surprised that everyone who tried these loved them.

Perfect and unique for the holidays!

Saturday, November 6, 2010

Lime Bars (the code was lime bars)

IMG_6934

OK, so someone out there might be sick of baby news. I mean, you all do have regular lives going on, not that I would know because I haven't had the chance to see what anyone else in the world is up to.

IMG_7109

You see... we're all wrapped up over here... oh geez, with the stupid pun. Anyway, for those of you looking for baby news you'll be happy to know that lime bars had a hand in my successful hospital experience.

You all know that I've been on a baking streak and so I would set aside things to take to the hospital in case I went into labor. I put aside half a pan of lime bars to bribe the nurses to be nice and give me drugs and trade me for a baby. AND IT WORKED! Lime bars were to be the code words for when I went into labor. My sister and I would send false texts to each other... lime stars! We joked that mom couldn't ever remember the code. When we showed up at the house the morning of Halloween she mumbled something and said, "lemon drops?"

Coming up next I'll tell you about the birth and the drama and trauma of breastfeeding as I've come to experience it so far. Just know, that I am reading your messages, love and truly appreciate them and will respond before Peanut turns 13.

Back to the lemon bars!!

My parents neighbors gave us a bunch of limes and I wanted to make something easy with them. I came across this lime bar recipe by the Neely's and had to try it.

The recipe is really easy with a cookie crust (which I find easier than the shortbread crust) and the curd set perfectly.

IMG_6930

Excuse my lack of pictures- in my baking fury lately I keep forgetting to pick up my camera.

Preheat your oven to 350 and spray a 9 x 13 inch pan.

In a medium bowl mix 1 cup room temperature unsalted butter with 1/2 cup powdered sugar on medium-high for 2-3 minutes until light and fluffy. Add 2 cups flour and a pinch of salt and mix for a minute until well combined.

I just now realized that I forgot to spray the pan which is why my corners stuck. Oops!

Press the dough into your pan and bake for 20-25 minutes until lightly golden. If you are having a problem with your dough sticking to your spatula or spoon as you try to spread it, give it a quick spray with some Pam.

IMG_6931

For the topping whisk together 4 eggs, add 2 cups of sugar and whisk again.

Add 6 tablespoons of flour, whisk away.

Add 1/4 cup plus 2 tablespoons of lime juice and 2 teaspoons of lime zest and.. you guessed it... whisk again.

For the record this would definitely work with lemon juice.

Pour your mixture over the crust (I didn't wait for it to cool) and bake for an additional 25 minutes or until set. I ended up baking mine for about 20 as it was getting pretty brown on one side.

IMG_6937

When you pull it out of the oven make sure you let it cool before you slice it up. That way the curd gets a chance to really set. Dust with powdered sugar, lots of powdered sugar.

I would go a step further and garnish with some lime slices or some candied lime peels for a special presentation. Otherwise, I'm not sure people would know they are lime bars since we automatically think lemon when we see these.

Like I said, I'm pretty sure my bribing worked as I ended up with a gorgeous baby boy. Who knows what kind of kid I would have ended up with if I had showed up with liver and onions.

I'm sure these will be a hit, let me know when you try them!

Wednesday, October 27, 2010

Cranberry Orange Chews

No baby news yet! What's the next best thing? Food. Dessert is the next best thing.

IMG_6812
Cranberry Orange Chews are a family favorite of Elle Bee's and that kind of endorsement is good enough for me.

IMG_6792

Preheat your oven to 350 degrees. The recipe starts with 1 1/2 cups (3 whole sticks!) or room temperature butter. Really, with this kind of a start you just can't go wrong.


IMG_6793

Mix the butter with 2 cups sugar, 1 tablespoon orange zest and 2 teaspoons of vanilla. 2 whole teaspoons of vanilla- I'm telling you this recipe gets better and better.


What do you mean some of my zest looks green? I was just slightly short on the orange zest and threw in a bit of lime zest because we have a surplus of limes around here right now.

IMG_6795

In a separate bowl mix together 3 1/4 cups all-purpose flour, 1 teaspoon baking powder and 1/4 teaspoon salt.

IMG_6796

Here you see my nephew and niece doing the tedious cookie work. I'm not overly fond of cutting cookies into shapes and/or deocrating them.


They are finishing up the Amaretto Orange Bites for me. I think family cookie making is one fantastic reason to procreate.

IMG_6803

That and the ability to make goggles out of cookie cutters. The fun never ends!

IMG_6806

Add the dry to the butter mixture, stir to mix and then beat until the dough starts to come together, about 5 minutes or so. I kept going past the point you see above but before you got one big clump of dough.

IMG_6808

Mix in 1 1/2 cups of dried cranberries and 1 1/2 cups of coconut. It may seem crumbly but you can press it together in the next step.

IMG_6809

Shape the dough into 1 inch balls and place about 2 inches apart on a buttered cookie sheet.

IMG_6816

Bake in the oven until the edges just begin to brown, about 8 to 11 minutes. The less cooking time, the chewier the cookie. Let them cool on the sheets for about 5 minutes then transfer to a wire rack to cool completely.


What do you do if you and your family are really loud and noone hears the alarm go off, thus over-baking into hard completely browned cookies?


Well, if that sort of thing were to happen and you don't feel like breaking a tooth trying to chew them, I have heard you can dip them. Dip them in coffee or tea like a biscotti. They will still taste amazing. Don't you dare waste one of these cookies.

IMG_6814


These were immediately declared a winner. You get this great orange kick and the cranberries give off so much flavor. They are buttery but still chewy and an absolute must try.


Thanks Elle! I have a feeling these will be a yearly cookie from now on.
Related Posts Plugin for WordPress, Blogger...
Blogging tips